
Congratulations! So you just had Quantum Leap Chicago build you an awesome website. But you want to make changes of your own? No problem! This quick guide will help you hit the ground running!
Technology Stack: WordPress and Colibri Pro
I’ve always had a love for WordPress since I started working with it in 2006, since it makes it easy for normal people to manage their websites. You don’t need to learn how to use FTP or even cPanel. I’ve tried a few other CMS and site builders including Drupal 7 & 8, OctoberCMS. But nothing rivals WordPress. I’ve decided to use it for building most websites for clients, since it’s easy to manage and maintain.
After many years of custom web development, I’ve always eschewed WYSIWYG editors — they tend to produce code which is bloated, and don’t give you all the options you need. Some of them are little more than abstractions (like Divi) which provide no value at all. I even did a stint with Squarespace, but their site builder at the time simply didn’t have the options I needed.
Enter: Colibri WP. I tested this extensively before deciding to purchase the Agency Lifetime $600 package, since it’s very powerful and fully customizable. It makes it easy for people of all skill levels and backgrounds — even complete beginners — to create something beautiful and functional.
By choosing Quantum Leap Chicago, you have full access to use the full Colibri Pro plugin, as long as your site is hosted with us!
Before Starting: Design Considerations
There’s a LOT to consider in web design before you even start. First and foremost:
What is the purpose of your site? Is it a vanity or personal site to showcase your work? Or is it to get people to contact you for quotes? Do you want to sell your own products without paying 5% to Etsy? The purpose of your site should strongly influence your design choices. For example, whether you have buttons leading people to contact you, a contact form, linking from front page to second pages (such as
Layout and Readability: We live in a world of hypermedia, where memes and short videos dominate most people’s attention spans. Too much text is a bad thing. If you do have text, ensure it’s high-contrast, and large (even on mobile) to make it easier to read.
Pop-ups, sound, ads, and auto-play videos: As a general rule, nobody wants these! Pop-ups when you first visit a page are used to reduce your bounce rate, that is, the number of visitors who don’t click anything on your site. If all your info is on your first page, or you have a compelling button / funnel which leads them to your “services” or other pages, you don’t need it. Studies have shown front-page pop-ups don’t work. If you do decide you want to place ads or have a pop-up at the end of your articles, let us know and we can help you maximize the potential.
Getting Started
Colibri consists of two pieces: The Colibri Theme, and the Colibri Editor plugin. Both must be enabled for it to work. (This is already done for you).
Publishing: After making any changes, you’ll need to click the “Publish” button in the upper left, and wait 2-3 seconds for it to publish. If you don’t, you’ll get prompted before you try to exit the page, and it won’t save your changes.
Edit existing pages: Either browse to the page, and click the “Colibri -> Edit with Colibri” from the top menu; or, you can browse from WordPress Dashboard -> Pages -> All Pages -> and click “Edit with Colibri”.
Creating new pages: Browse to WordPress Dashboard -> Pages -> All Pages, then select “Create New Page”. Give the page a title, and hit Publish in the upper right corner, and confirm.
Note: WordPress has it’s own editor, which allows you to type text and include basic pictures and links. While Colibri will show this content on the page, it can NOT adjust layout or other options besides very basic styling. As such, we recommend not including ANY content in the WordPress default editor; you should ALWAYS use the “Edit with Colibri” function.
Editing Menu: If you create a new page, you’ll need to add it to the menu. First, go to WordPress Dashboard -> Appearance -> Menus -> and create or edit your menu there. You can add pages, create sub-menus, etc. Secondly, on your front page, you’ll want to Edit With Colibri -> Click on the Nav Menu (usually in upper right) and then ensure it’s set to the menu you want. You can also edit the menu layout here.
Adding New Content: You can use the + symbol on the right to add new blocks, or custom items such as headings, text, buttons, and images. You must drag and drop where you want it.
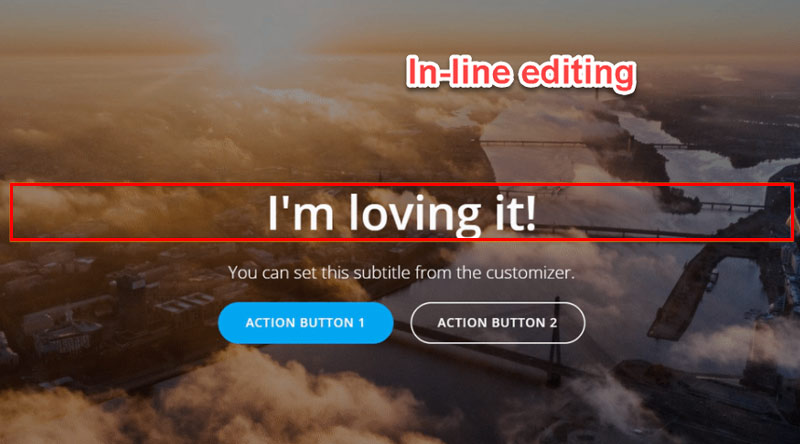
Basic Editing: Click on any element, such as the background, the text, images, top bar, or even meta-items like columns and rows. As you hover your mouse over different parts, you’ll see the different elements — for example, if you hover over a text box you should see an orange outline, but if you move it slightly outside, you’ll see the blue outline of the row or column. You can then edit using the left side bar. There are usually 3 tabs here:
- Content: Allows you to edit basic settings of the item you’re editing, such as selecting icon, text alignment, or image size, as well as spacing.
- Style: Allows you to edit colors, font, sizing, and borders.
- Advanced: Custom options such changing display on hover, opacity, advanced spacing, and borders.
Next Level
Element Options: When you hover over an element, you’ll see an orange or blue pencil in the corner. By clicking this, you have some additional options, such as copy / paste style, add new rows or columns, or other settings.
Duplicate Element: You can use the pencil icon in the corner to duplicate an element. Note: Duplicating Elements will Link them, so any style changes made to one will affect the others. Many items are linked, such as Header styles etc. You can use the “unlink” in the Style section to unlink items.
Use Front Page Navigation: first, update your front page, then you have to ‘use front page navigation’ on every page. It is not dynamically linked, you must do this for every page.
Responsive Design: You can use the Desktop / Tablet / Phone icon at the bottom of the left bar to see how your site will look on different devices. When you change something in one of these modes, it generally will ONLY show on that layout. The exception is text content and general layout; whatever text you have will show on all three layouts, but you can change the style / size per-device.
Pro Tips
Advanced Responsive Design: Want to hide something on mobile? Select element, go to Advanced, and under Responsive Design choose “Hide on Mobile”.
Must have at least one block: With pages which have a large header, that may be the only content you have. If so, you’ll see an ugly white block on your page, as a page always consists of Header, Body, Footer. As such, a “Header only” page needs at least one block. Create a blank block, save as reusable section, you can set min height to like 25 on it. If you match it to your header
Header / Footer Design: Most pages will share the “inner page header”. To change this, you must use the left bar, click back out of any element, then click the gear icon on the header, and choose “Create New Header”. This will allow you to edit the header for that page only.
Tinkering without breaking: I recommend creating a new page, and then playing with it there to test out your new design. You don’t have to put it in your menu, so generally people won’t find it. You can also choose “Demo Site” from the Colibri options and play with an online demo as well, if you want. I strongly recommend taking some time to tinker with advanced options and layouts to familiarize yourself with all the options Colibri has!
Secret Sauce
There’s a lot more that Quantum Leap Chicago offers, that you may not be able to do yourself. Custom 404 pages? Embedding raw PHP or JavaScript? eCommerce? SEO? Don’t hesitate to contact us if you need help!
Colibri Documentation
You can view and search the full Colibri documents here: https://docs.colibriwp.com/
Additional Notes
Support Options: Need some help? We’re happy to help. Our Full Website and Deluxe Website package includes unlimited support – just email us if you have any questions, and we’re happy to answer! Basic Website package does not include support. Support is billed hourly at current hourly web development rate, in 15 minute increments, and must be paid in advance.
Backups: We have multiple backups of your site. While keeping the backups is part of all of our web plans, having to restore them due to changes you make to the site and wanting to revert may be a billable item. Restoring backups is included in the Full and Deluxe website packages (up to 1x / week); and restoring backups for Basic website package is free 1x per year, and after that becomes an hourly billable item, at current hourly web development rate, and must be paid in advance.
Wordfence Security: We use Wordfence to help protect the site. We strongly recommend setting up 2FA authentication. We’re happy to help you with this for FREE. Please note that your username and password are carefully selected, and we do NOT recommend changing it, but keeping it saved in your browser. We are happy to help you if you forgot your username or password.
Adding new plugins or changing theme: If you want to do this, please contact us so we can review. There are a lot of weak and exploitable themes and plugins which get abandoned, and almost everything can be done without a plugin from some random developer.
Designed by Quantum Leap Chicago: This is mandatory to have for Basic and Standard Web packages.
Custom OpenGraph or email functionality, Custom 404 page, eCommerce: Please contact us.
Custom Development: Need something else? We’re happy to help. We can create custom code or plugins for you. Please contact us.